Tuesday, April 29, 2014

Bows and Greyhound polish

Hey Everyone! I have a love/hate relationship with the mailmen that deliver to my job. Today I hate them. I could go on a long rant but I won't bore you with the details. One day I am going to end up throwing mail at one of these jerks though. One day it will happen! 

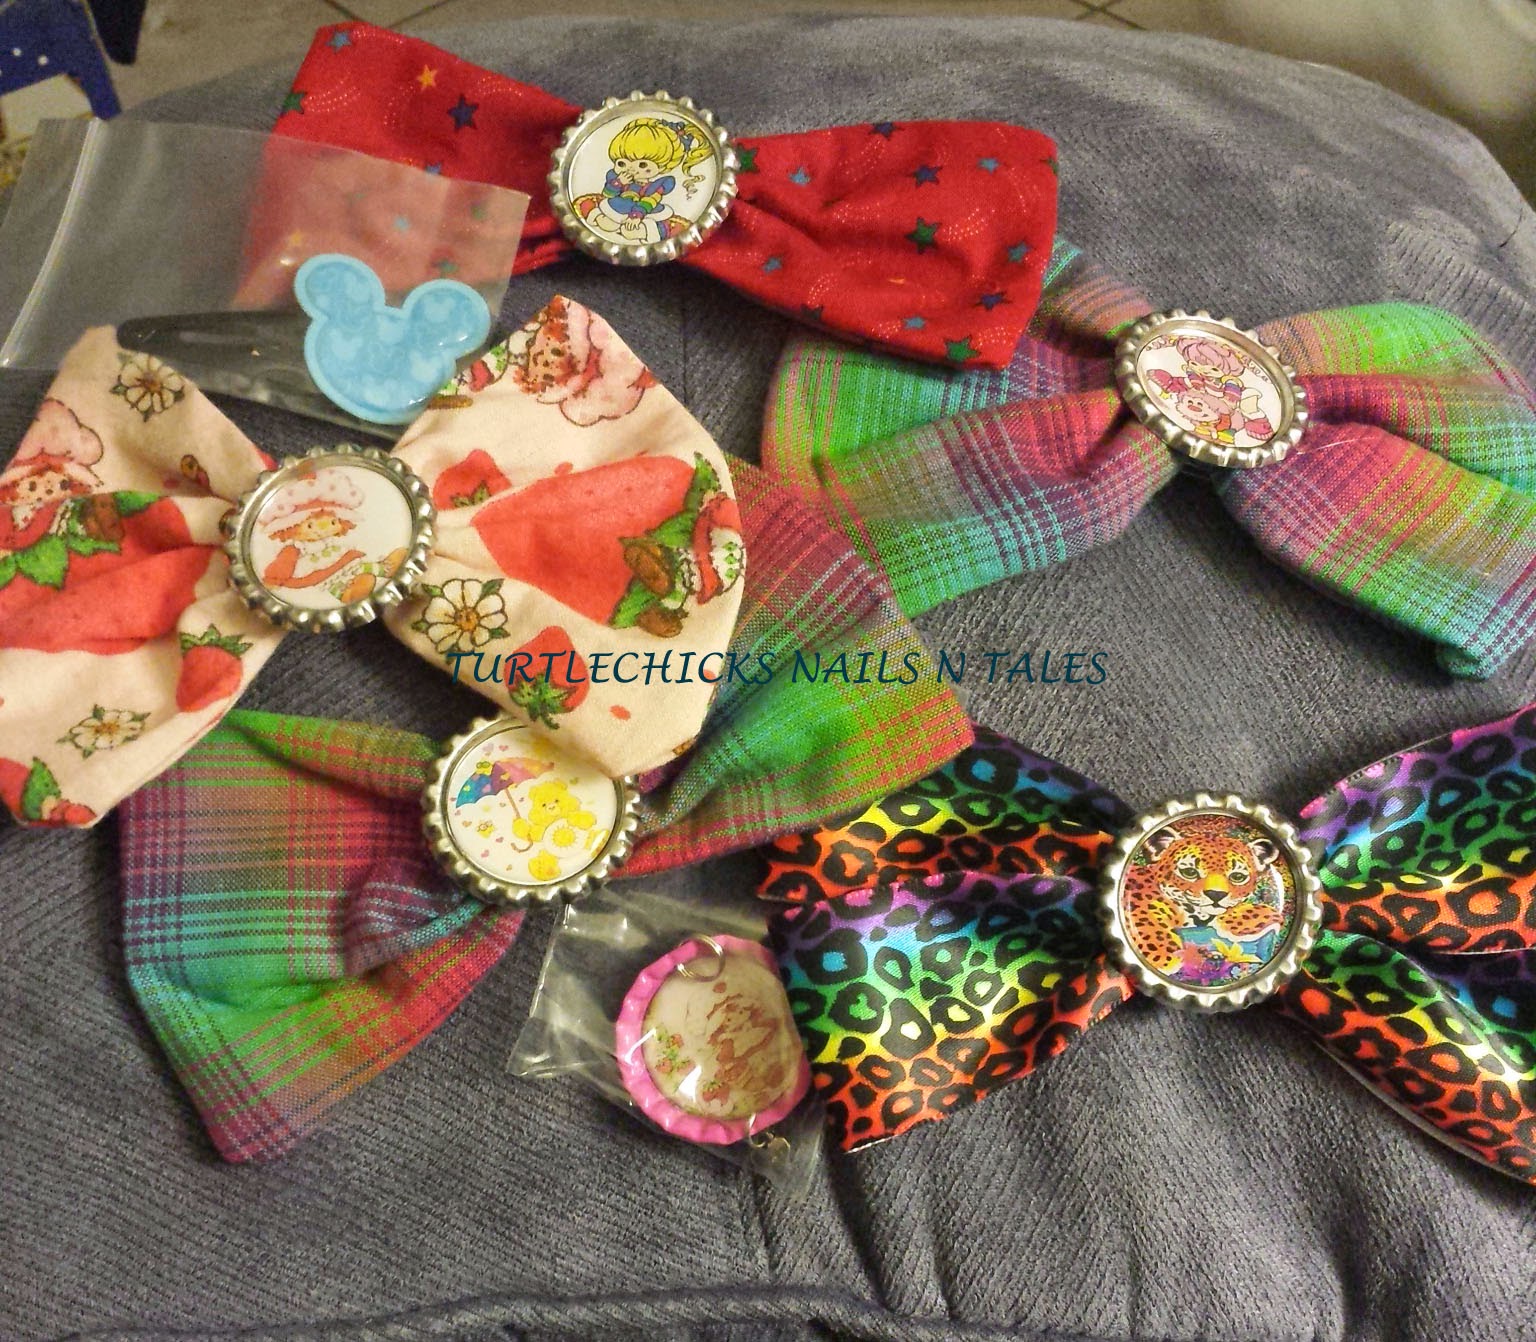
Since today's mani is somewhat of a fail so I added some fun pictures to brighten up the post. I recently came across an awesome store over on storenvy called S&M Bows and Stuff while I was looking for nail plates. I am a kid of the 80s/90s and I love the cartoons from that era. I also love Disney stuff. When I saw the bows and earrings and necklaces in shop I basically freaked out. Literally freaked out because there was some awesome stuff and the prices are so reasonable. Since I am not 5 nor am I a cheerleader I didn't think I could pull off wearing these super cute bows in my hair. I was slightly disappointed until I realized HELLO, I KNOW KIDS!! So I ordered a bunch and I didn't break the bank doing so. I can not rave enough about the awesome customer service and great product. I asked for a couple of bows that weren't listed in the shop and I was given several different options to choose from. You know I had to buy several! 


When the bows arrived I freaked out even more. They are so cute and so awesome. I couldn't stand the excitement so I had Neil try one on. Since C whined that I couldn't put a hair bow on a boy cat I put it on him like a bow tie. I am going to actually order some for myself. Screw it, I don't care if I am not 5 years old, these bows are cute and I am going to wear one! I have an idea for a couple that I would love to have for when I am at the kennel so I will have to look into if we can make those happen. 


This was the entirety of my order. How awesome is that Rainbow Brite bow? She was my favorite as a kid. I need to mail these out so I can see if the girls like them. If they don't I am definitely telling their mother to send them back to me and I will wear them myself! Super cute stuff. You can check out S&M Bows and Stuff on Facebook too. 

I guess we should get to the mani now huh. Since April is National Greyhound Adoption Month and I love all things greyhound when I heard about a special greyhound polish I had to check into it. I saw a random post on Facebook about this Charity Polish that Spellbound Nails put out for April called Racing into Our Hearts. I have heard of Spellbound Nails but hadn't tried any of their polish yet. After talking to C and telling him how a donation from every bottle sold is being given to Allies for Greyhounds he encouraged me to go buy it. I did. 


I didn't want to have to use too many coats to cover such a dark base so the first time I used Racing into Our Hearts I did so as an accent. I used three coats on my ring finger and then stamped with it on the other nails. The stamping is supposed to be paw prints but you can hardly see them.


The paw prints showed up a lot better before I put topcoat on the mani. The stamping is the semi fail aspect of this mani. I didn't necessarily expect the polish to stamp well but it didn't do too bad. If I hadn't put top coat on the mani you would have been able to see the paw prints really well.


Racing into Our Hearts is a very pretty Butterscotch color. It looks much more gold in these pictures than it looks on my hands. I was trying to show the holo before the sun disappeared on me.


I didn't love this mani but I do like Racing into Our Hearts a lot. I love that it is a greyhound polish!


Not only is this baby holo but it has dark flakies in there to represent the brindle color of a greyhound. It is a pretty awesome interpretation of a brindle. I am going to have a full mani of Racing into Our Hearts for you tomorrow. 


That's all for now :)

Monday, April 28, 2014

Black Holo Foil Gel Mani

Hey Everyone!! Monday has got to be my most disliked day of all time. I dread Mondays. I think it is mainly because I spend most of my weekend at the kennel and haven't had much of a break. Friday I had a migraine but had to go to work anyway. It was quite unpleasant. Saturday I tried to relax so I stayed home all day and laid around then ran a couple of errands when C got home from work. Apparently I need more downtime than that because I am once again exhausted on this fine Monday and I would like nothing more than a nap. We also started Weight Watchers again so I would really like some food in addition to that nap. I didn't play very well and don't have much for an afternoon snack. Is it Tuesday yet?

Today I have a mani experiment to show you. I was hoping I could get nail foils to work with my gel mani. Unfortunately it wasn't a complete success but at least it wasn't a complete fail either. 


I used Fantasy Starry Holo Nail Foils Glitter Transfer Stickers #76 from BornPrettyStore. These sheets of foil was .99 and a great way to give foils a try without committing to ordering too much. I actually used twice as much as I would normally use because I had so many issues working with the gel and I still barely made a dent in the sheet. Design #76 is quite pretty and since the base of the foil is a black or charcoal color I figured I would use a black or dark gel polish. I was hoping a dark base would show off the pretty foil. 


I started with my left hand and used a black polish from Sally Hansen. I had the worst time trying to get the foil to stick to the sticky layer of the mani. I tried as many different tricks and techniques as I could come up with and nothing worked. In the end I had to use a clear polish and let it dry until it was tacky. The foil then stuck to that polish. I was able to do my gel topcoat to seal the foil in.


I didn't think that the foil was showing up as well as I wanted so I attempted a blue base for my right hand. Once again I couldn't get the foil to stick to the gel so I had to use clear polish and then gel topcoat.


I didn't get the effect I wanted but look at how pretty the foil is in the light. This mani actually reminded me of bowling balls for some reason. I really liked the look of the foil but that color spark was not as evident in regular lighting. It took a lot of bright light to really show the colors.


I didn't like the blue base as much but it was still quite cool looking.


I think the indoor shot above shows the look that really reminded me of a bowling ball. I really liked this mani but I did have some issues with it. 


The gel top coat had an issue on a couple of nails where it didn't cover the foil. I didn't notice it at first but then started to see a couple of spots where the nail was dull and I could scratch away at the foil. I was really careful about covering the entire nail with topcoat plus I had used a layer of Structure before the top coat. I am not really sure what happened to cause the issues.


Since I only had issues with a couple of nails I just applied a new layer of top coat on the problem nails and hoped for the best. It seemed to work and keep the foil from trying to escape.


I absolutely love nail foils now. They are fairly easy to use, though not quite as easy when using gel polish. They look really neat and add quite a cool aspect to your mani. I am definitely going to need to purchase more foils in the future.


My goal is to have a mani where the entire nail is covered in foil. I have yet to be able to get that result but I am determined to make it happen. Using a base that works with the color of the foil definitely helps. 


It was harder to tell where the foil didn't quite cover the black nails where as it was quite obvious with the blue base. I might have to look into the foil adhesive too. Using polish works quite well but I would like to see if there is any advantage to the adhesive. I am sure Elmers School Glue would work too.


You can purchase this and many other nail foils at BornPrettyStore. You can use coupon code JLG10 for 10% off. 

That's all for now :)

Wednesday, April 16, 2014

My Greyhound Adoption mani

Hey Everyone! It has been a crazy two days at work. The guy that works in the warehouse has been out sick so I have been covering for him. It is quite hot out there! I think it was 87 yesterday and the heat and humidity zapped all my energy. It didn't help that I spent the morning at the doctor's office and didn't eat anything until 1pm. Gotta love that blood work that requires fasting when your appointment isn't until 11:30am to begin with and then they don't bring you back into an exam room until well after noon. I am trying to get this in before heading home for the day so it should be brief. 


As you may know C works for a Greyhound Adoption. I volunteer over there a lot and have been taking pictures like the one above for National Adopt a Greyhound Month. I got the idea to do some nail art for the weekends based on the shirts that the group wears.


Since I don't have a greyhound stamping plate I made some water slide decals. I used some different images including one of Mr. Bruce! I am happy to report that they worked wonderfully and though I haven't tried the Bruce decals I will very soon.


Above is a picture of one of the shirts and my mani. I have a shirt that is in purple but it is pretty old and ragged so I took a picture of the pink one because it is newer. The purple one is what inspired the mani. I added the paw print on my pinkie because I couldn't leave it naked.


I did this mani with a base of Gelaze Secret Periwinkle. I stamped a pattern on the background with Konad m64 and Sinful Colors Slick. I stamped the paw print, peace sign and heart with black polish. I didn't realize I should have done my right hand with the pictures in the opposite order so of course they are backwards. duh for me.


I loved this mani but I meant to do some white stamping in the background to make it look more like the tie dyed t-shirts. Next time I will do something like that. I loved the mani but of course no one really noticed it much less connected it to the shirts I was wearing that weekend. Ah well, at least I can blog about it and enjoy it myself.


Sadly this mani didn't last through the weekend. Did I mention the kennel is terrible on my nails? 

That's all for now :)

Friday, April 11, 2014

Secret Periwinkle Flowers

Hey Everyone!!! Happy Friday to you! I am so tired today. Instead of going back to sleep for a bit after dropping T off at school I went to the grocery store. I then made lunch and went over to the kennel to try and get some pictures of the dogs before coming to work. I am actually regretting not sleeping now that it is slow and I am quite sleepy. It is either going to be an early night or a lazy night because right now I am pretty tired. Thank goodness it is Friday!

Today I have another Gel mani for you with some stamping. I only have three pictures though for some reason. I was really eager to play with my new Konad toys that a lovely nailboard friend sent me. I have never had an actual stamping polish so I was super excited to use one of the ones she sent. I didn't quite think the color combination through though and I ended up not liking this mani as much as I wanted to.


I started with a base of Gelaze Secret Periwinkle. This one was a little thicker but application was no problem. It actually lasted about 6 or 7 days before I had lifting and chipping and had to remove it. The abuse I put this gel mani through included scrubbing 30 muzzles clean at the kennel.


I used Konad plate M64 for the flower design and Konad Yellow stamping polish. I then used Milani Creamy Pistachio to add random dots. I must say using polish that is meant for stamping as opposed to polish that may or may not stamp well is quite nice. I have never used an actual stamping polish and not having to worry about if it is going to show up is great. It is also great to know that you can rely on that polish to do what you want instead of being disappointed when your stamping is so subtle it is hardly noticeable. I wouldn't stop stamping with normal polishes but I definitely see myself buying some more stamping polishes! 


That's all for now :)

Tuesday, April 8, 2014

Gelaze Flip Flop Fantasy

Hey Everyone! I spent today working on that gel mani with foil. Oy. I will have a post all about it later. I am probably going to be doing a lot of manis with the same base and then stamping over them for a bit. My helmers are all tucked behind the bed crammed into the small bedroom right now. I don't have much access to them though I do have some stragglers that are out and about. I also have been keeping a gel mani on to help my nails grow out their damage and not break while I am at the kennel on the weekend. I have still had some breaks and the gel only lasts about a week with all the kennel work. 

Today I have a post with the new Gel polish line from China Glaze. The line is called Gelaze and actually doesn't require a base coat which is kind of nice. I picked two colors up when they were on sale at Sally Beauty Supply last month. You know I had to give them a try since China Glaze is one of my favorite brands.


The first one I used was Flip Flop Fantasy. I actually do not have this one in the regular formula but since I had wanted it I decided I had to have it in the gel formula. I think it is close to the color of the regular polish but since I don't have it I can't compare it. My pictures do not do this polish justice at all, it is much brighter and prettier in person. My camera kinda freaked out a bit though.


For the accent nail I used Elevation polish Huangshan. I loved these two together! 


I wish my pictures had come out a little better to show you how bright and fun this mani was. I am going to do another mani using it soon because I did not have good results with this one at all. My thumbs were chipped within 2 hours and the entire mani didn't last more than 4 days. I found the polish rather thick too. I was not really happy with it but I was also trying a new technique that I had read about where you put acrylic powder on your layer of structure to give it added strength. I will try again when I can judge it on my normal technique.


As a side note I didn't notice that there was any more strength with the added acrylic powder as I usually get with just the structure gel. I did one hand with the acrylic powder but then I was running late so I did the other hand with just structure gel. I didn't notice any notable difference between the two but the acrylic powder hand took much longer to soak off.


I stamped a design on the other nails the next day with Pueen plate Pueen 08 from the 25F set. I used a standard black Wet n Wild polish I had with me.


I loved this mani but I kept wanting to add more color to the stamping. It started to lift and come off so I had to remove it before I got a chance to add anything.


That's all for now :)

Monday, April 7, 2014

My first foil mani


Hey Everyone!!! That was a long break. Sorry about that. I am back! I might not be back with daily posts yet but I will definitely be posting more than the past few weeks. The house is still crazy with redoing the floors and moving everything around but life in general is not as stressful. 

This mani is from before the break both from blogging and of all my nails. Right now I am sporting major nubbins. In these pictures my pinky and ring nails were literally holding on by silk wraps and glue and finally gave out. I had cut them all down and all was well until they decided to break even shorter. It has been a long battle keeping my nails long especially with all of the time I spend at the kennel. Dog crates and muzzles do not treat nails well. Even with the gel manis I try to keep on there to protect them a bit. 

I had looked at nail foils for a very long time and loved the manis I saw people do using this medium but for some reason it took me way too long to try it out. I ordered two different foils from BornPrettyStore not long ago to give it a try. 

**Image used from BornPrettyStore.com**
They are .99 cents for a sheet and I decided I had to give it a try. I absolutely loved this mani. I took a ton of pictures of it because it was so very cool looking. I can't even remember how long I wore it before reluctantly removing it.


I started with a dark base that was an almost black teal. I was lazy and painted it over the red I already had on which is why you see red around the cuticles. Now I didn't order the foil adhesive because I just didn't think about it at the time. I didn't really need it but I did have to look up several places to find out how to apply the foils without adhesive.


Basically I cut small rectangles out of the sheet of foil. They were big enough to cover my entire nails but not much bigger so I didn't waste any. I ordered #18 which is a rainbow sheet. 


Honestly I wanted to do the entire nail in foil so it was a solid look instead of what it turned out as. Something Minx looking. Obviously that didn't work out but it was my first attempt. I tried using a top coat then waiting till it was almost dry to apply the foils. What I realized after trial and error is that I could apply the foil to the base color just as easily. I painted my nail with the base color then waited until it was almost dry. When it was almost dry I lightly pressed the foil to the nail and removed the clear backing. If I let the polish dry a little too much foil didn't transfer as well in those areas. It was a trial and error event but by the end it was pretty easy to manage.


If spots were missing some foil I went back over them and rubbed some more foil on. The sheet is roughly 12 inches long by 4 inches wide. I had plenty of this sheet left over for many more uses. The sheet comes folded into a square and packaged in a plastic sleeve like the picture above shows. They are really the perfect size for someone, like me, who wants to try foils out without committing to a whole roll. 


I am going over my next foil mani in my head right now. I think I might be trying the other pattern I bought, #76, tonight with a gel mani. I will see if I can get that to work together.


I thought my thumbs came out really cool so I figured I would show them this time.


The foils were really pretty and glowy.


That's all for now :)